Showing posts with label BLogger Templates hacks. Show all posts
0
[postlink]https://iamdaowner.blogspot.com/2012/06/related-posts-widget-for-blogger_19.html[/postlink]

Related Posts Widget for Blogger v1

The related posts widget will show a new related posts section below your post.The related posts widget fetches the related posts from those posts having the same label as the current post.
To implement the related posts widget you will have to follow 2 simple replacement steps.
1.Login to your blogger account and get into your Dashboard
2.From there go to Layout > Edit HTML and expand your widget templates(option on the right)
3.Now find this line of code
</head>
and replace it with
<!--Related Posts Scripts and Styles Start-->
<!--Remove--><b:if cond='data:blog.pageType == &quot;item&quot;'>
<style type="text/css">
#related-posts {
float:center;
text-transform:none;
height:100%;
min-height:100%;
padding-top:5px;
padding-left:5px;
}
#related-posts .widget{
padding-left:6px;
margin-bottom:10px;

}
#related-posts .widget h2, #related-posts h2{
font-size: 1.6em;
font-weight: bold;
color: black;
font-family: Georgia, &#8220;Times New Roman&#8221;, Times, serif;
margin-bottom: 0.75em;
margin-top: 0em;
padding-top: 0em;
}
#related-posts a{
color:blue;
}
#related-posts a:hover{
color:blue;
}
#related-posts ul{
list-style-type:none;
margin:0 0 0px 0;
padding:0px;
text-decoration:bold;
font-size:15px;
text-color:#000000
}
#related-posts ul li{
background:transparent url(https://blogger.googleusercontent.com/img/b/R29vZ2xl/AVvXsEgdypHpys86r2NsWc7Z3hP4d62XelvgibEJAoQzY6N_6Pgv2OaOkNAr8fp-unZoJlanriNE7KfTuwU1T18OMAoayOG2ne_nX4eBqZ_pG02qPGyEkjTI2-w30lEPBEFvVd6nyw2Qmvnh1U0/s200/greentickbullet.png) no-repeat ;
display:block;
list-style-type:none;
margin-bottom: 13px;
padding-left: 30px;
padding-top:0px;}
</style>

<script type='text/javascript'>
var relatedpoststitle="Related Posts";
</script>
<script src='http://bloggergadgets.googlecode.com/files/related_posts_min.js' type='text/javascript'/>

<!--Remove--></b:if>
<!--Related Posts Scripts and Styles End-->
</head>
If you want to change the title of your widget you can edit this line of the above code
var relatedpoststitle="Related Posts";
If you want you can edit the blue and black colors present in this code
4.Now find this line of code
<div class='post-footer-line post-footer-line-1'>
If you cant find it then try finding this one
<p class='post-footer-line post-footer-line-1'>
Now immediately after any of these lines(whichever you could find) place this code snippet
<!-- Related Posts Code Start-->

<!--Remove--><b:if cond='data:blog.pageType == &quot;item&quot;'>
<div id='related-posts'>
<b:loop values='data:post.labels' var='label'>

<b:if cond='data:label.isLast != &quot;true&quot;'>
</b:if>
<b:if cond='data:blog.pageType == &quot;item&quot;'>

<script expr:src='&quot;/feeds/posts/default/-/&quot; + data:label.name + &quot;?alt=json-in-script&amp;callback=related_results_labels&amp;max-results=6&quot;' type='text/javascript'/></b:if></b:loop><a href='http://www.bloggerplugins.org/2009/08/related-posts-for-blogger-widget.html'><img style="border: 0" alt="Related Posts Widget for Blogger" src="http://image.bloggerplugins.org/blogger-widgets.png" /></a>

<script type='text/javascript'>
var maxresults=5;
removeRelatedDuplicates(); printRelatedLabels(&quot;<data:post.url/>&quot;);
</script>
</div>

<!--Remove--></b:if>
<!-- Related Posts Code End-->
var maxresults=5;
this line determines the number of related posts that are displayed..and by default 6 posts are fetched from each label.
Now you should have a working related posts widget on your blog.If you want to customize the look and feel,then you can alter the CSS rules.OR if you have any doubts or need any modifications,you can surely contact me via comments or at Blogger Forums .The codes are well commented .So this can be easily removed whenever you want..
Note: If you want to display the Related Posts on every page, then remove the 4 lines of code starting with <!--Remove—>
Update 29/03/2012 : If the script is not working anymore, do change http://blogergadgets.googlecode.com/files/related-posts-for-blogger.js to http://bloggergadgets.googlecode.com/files/related_posts_compressed.js
Sorry for the trouble :-)

Related Posts Widget For Blogger

0
[postlink]https://iamdaowner.blogspot.com/2012/06/related-posts-widget-for-blogger-with.html[/postlink]

Related Posts with Thumbnails for Blogger

related posts with thumbnails for blogger
Displaying the links to related posts along with a thumbnail of the corresponding post will help you increase the page views/user .Users will be tempted to go for the related posts when they are presented attractively with thumbnails.
This is another first release from me.This one also uses the media thumbnails generated by blogger for each post.
For displaying the thumbnails,this widget will use the images uploaded for the post using the blogger image uploader(from the post editor) [Update - Now supports external images also.]

Related Posts Widget with Thumbnails for Blogger

Here are the detailed steps to install the related posts widget for blogger with thumbnails
1.First of all Login to your blogger dashboard and navigate to Layout > Edit HTML and check the "Expand Widget Templates" check box
2.Now look for
</head>
and replace it with
<!--Related Posts with thumbnails Scripts and Styles Start-->
<!-- remove --><b:if cond='data:blog.pageType == &quot;item&quot;'>
<style type="text/css">
#related-posts {
float:center;
text-transform:none;
height:100%;
min-height:100%;
padding-top:5px;
padding-left:5px;
}

#related-posts h2{
font-size: 1.6em;
font-weight: bold;
color: black;
font-family: Georgia, &#8220;Times New Roman&#8221;, Times, serif;
margin-bottom: 0.75em;
margin-top: 0em;
padding-top: 0em;
}
#related-posts a{
color:black;
}
#related-posts a:hover{
color:black;
}

#related-posts a:hover {
background-color:#d4eaf2;
}
</style>
<script type='text/javascript'>
var defaultnoimage="https://blogger.googleusercontent.com/img/b/R29vZ2xl/AVvXsEhK7qd-06UIvSStkIxincPqcyaBrw34gfSV2vLNf58Q1Q6rdMD-Jp3UiAUl3yehSYS2Zzh4kg3tV1rhO2SrBDpQY0-bGV94tyVtHy_O8KER44HW1MBuVLOo-NHmGb6Aa62cHzL8B-Lkgww/s400/noimage.png";
var maxresults=5;
var splittercolor="#d4eaf2";
var relatedpoststitle="Related Posts";
</script>

<script src='http://bloggergadgets.googlecode.com/files/related_posts_with_thumbnails_min.js' type='text/javascript'/>
<!-- remove --></b:if>
<!--Related Posts with thumbnails Scripts and Styles End-->
</head>
3.Now Find
<div class='post-footer-line post-footer-line-1'>
If you cant find it then try finding this one
<p class='post-footer-line post-footer-line-1'>
Now immediately after any of these lines(whichever you could find) place this code snippet
<!-- Related Posts with Thumbnails Code Start-->
<!-- remove --><b:if cond='data:blog.pageType == &quot;item&quot;'>
<div id='related-posts'>
<b:loop values='data:post.labels' var='label'>
<b:if cond='data:label.isLast != &quot;true&quot;'>
</b:if>
<script expr:src='&quot;/feeds/posts/default/-/&quot; + data:label.name + &quot;?alt=json-in-script&amp;callback=related_results_labels_thumbs&amp;max-results=6&quot;' type='text/javascript'/></b:loop>
<script type='text/javascript'>
removeRelatedDuplicates_thumbs();
printRelatedLabels_thumbs(&quot;<data:post.url/>&quot;);
</script>
</div><div style='clear:both'/>
<!-- remove --></b:if>
<b:if cond='data:blog.url == data:blog.homepageUrl'><b:if cond='data:post.isFirstPost'>
<a href='http://www.bloggerplugins.org/2009/08/related-posts-thumbnails-blogger-widget.html'><img style="border: 0" alt="Related Posts Widget For Blogger with Thumbnails" src="http://image.bloggerplugins.org/blogger-widgets.png" /></a><a href='http://bloggertemplates.bloggerplugins.org/' ><img style="border: 0" alt="Blogger Templates" src="http://image.bloggerplugins.org/blogger-templates.png" /></a>
</b:if></b:if>
<!-- Related Posts with Thumbnails Code End-->
4.You can adjust the maximum number of related posts being displayed by editing this line in the code.
var maxresults=5;
you will also have to edit the posts per label(it should ideally be one more that maxresults)
max-results=6
5.To edit the title of the widget you can change this line of code
var relatedpoststitle="Related Posts";
6.To change the default thumbnail, you can edit this line of code
var defaultnoimage="https://blogger.googleusercontent.com/img/b/R29vZ2xl/AVvXsEhK7qd-06UIvSStkIxincPqcyaBrw34gfSV2vLNf58Q1Q6rdMD-Jp3UiAUl3yehSYS2Zzh4kg3tV1rhO2SrBDpQY0-bGV94tyVtHy_O8KER44HW1MBuVLOo-NHmGb6Aa62cHzL8B-Lkgww/s400/noimage.png";
7.To Change the Colour of the Splitter Line , edit
var splittercolor="#d4eaf2";
To change the other colours and all you will have to modify the CSS
If you fall into troubles implementing this,don't panic.. :) .just leave me a comment here and i will help you out. If you like to give me any suggestions on how to improve this widget,then it would be really great.

How to display the related posts on every page and not only on the post pages?

Just remove the two lines starting with <!-- remove --> from both step 3 and step 2.
that is lines
<!-- remove --><b:if cond='data:blog.pageType == &quot;item&quot;'>
and
<!-- remove --></b:if>
Update 29/03/2012 : If the script is not working for you then please change http://blogergadgets.googlecode.com/files/related-posts-with-thumbnails-for-blogger-pro.js to http://bloggergadgets.googlecode.com/files/related_posts_with_thumbnails_min.js
Sorry for the trouble :-)

Related Posts Widget for Blogger with Thumbnails

0
[postlink]https://iamdaowner.blogspot.com/2012/06/facebook-like-box-for-blogger.html[/postlink]
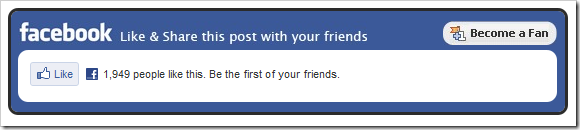
Facebook Like Button allows you to provide more Sharing Options to your Readers. Your readers can share your posts on Facebook using the Like Button. Have you added the Like button and still not getting any “Likes”? :(. Ok then we will present the Like button in a much better and elegant way.
Here is a Screenshot of the Facebook Like Box. Isn’t it lovely and more “Likable” than the default Like Button?
image
The  Facebook Like box also includes a link to  your Facebook Fan Page. This FB Like Box was Designed Styled and coded by Mia of Dezign Matterz .  Thanks to her for designing and styling  this awesome Like Box.

How to install the Facebook Like Box?

1. First Fill in the following Details (Code will be updated with these details)
Width of the Like Box                      (Enter the appropriate width of the FB like box)
Facebook Fan Page / Profile URL 
2. Now Login to your Blogger Account and navigate to Design > Edit HTML and check the option which says “Expand Widget Templates”
3. Look for  ]]></b:skin> in your template and just above that place the following code (You can use Ctrl +F to find the code).
.fb_like_box {
margin-top:10px;
-moz-border-radius:10px 10px 10px 10px;
border-radius:10px;
background-color:#3B5999;
border:3px solid #2B2B2B;
margin-bottom:10px;
padding:10px 7px;
width:540px;
}
.fb_like_top {
overflow:visible;
padding:0;margin:0 0 5px;
width:349px;
height:24px;
background:url("https://blogger.googleusercontent.com/img/b/R29vZ2xl/AVvXsEgtkpzvVoQco5mgldYHfX-EiBAuwdawUgCbRyzjXumWNnWscACwD3CzI559ODV_IgdS8jXVUM1iBQZeRByhwbe2ze85kQqzrV2hIYA0VJcRD4jqRwUNReGdXal2Zp52pTsc7Ka5G6LY_Tk/") no-repeat scroll left top transparent;
}
.fb_like_button_holder {
-moz-border-radius:10px 10px 10px 10px;
border-radius:10px;
background:none repeat scroll 0 0 #FFFFFF;
padding:12px 12px 0 12px;
width:515px;
height:42px;
}
4. Now Look for <data:post.body/> in your template and just below that add the following code.
<b:if cond='data:blog.pageType == &quot;item&quot;'>
<div class='fb_like_box'>
<div class='fb_like_top'></div>
<div class='fb_like_button_holder'>
<b:if cond='data:post.isFirstPost'>
<script>(function(d){
var js, id = 'facebook-jssdk'; if (d.getElementById(id)) {return;}
js = d.createElement('script'); js.id = id; js.async = true;
js.src = "//connect.facebook.net/en_US/all.js#xfbml=1";
d.getElementsByTagName('head')[0].appendChild(js);
}(document));</script>
</b:if>
<fb:like expr:href="data:post.canonicalUrl" layout='standard' send='true' show_faces='false' width="450" font="arial" action="like" colorscheme="light"></fb:like>
</div>
</div>
</b:if>
5.Next you have to add the fb namespace to your template tag.Your template should have the specification for the fb tag that you have used. The following namespace declaration will take care of that. To declare the namespace, find
<html
and change it to
<html xmlns:fb="https://www.facebook.com/2008/fbml"
The following screenshot will help you out.
imageThis is necessary for all FBML widgets using the fb tag.  So if you have already added the namespace while adding some other FB plugin, then you can skip this.
6. Now Save your template and you will see a Facebook Like Box on your post pages.

Facebook Like Box For Blogger

0
[postlink]https://iamdaowner.blogspot.com/2012/06/facebook-share-count-buttons-for-blogger.html[/postlink]
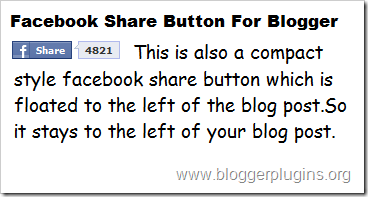
Facebook has now officially introduced the Retweet like Facebook buttons for your blogs or sites. These Facebook buttons look much similar to the Retweet buttons by Tweetmeme. Facebook has 5 styles of Sharing buttons. Here we will see two of them.
Adding a Facebook share count button will show a neat count of how many times your blog post has been shared on Facebook.
Note: The Facebook share buttons are deprecated and FB no longer supports it(It still works though). You can still add it if you want. You can also opt to add the new Facebook Like Buttons with Like Count.

Facebook Share Button Style 1

facebook-share-button-for-blogger-1

Code for Facebook Share Button Style 1

<div style="float:right;padding:4px;">
<b:if cond='data:post.isFirstPost'>
<script>(function(d){
var js, id = 'facebook-jssdk'; if (d.getElementById(id)) {return;}
js = d.createElement('script'); js.id = id; js.async = true;
js.src = "//connect.facebook.net/en_US/all.js#xfbml=1";
d.getElementsByTagName('head')[0].appendChild(js);
}(document));</script>
</b:if>
<fb:share-button expr:href='data:post.url' type='box_count'/>
</div>

Facebook Share Button Style 2

facebook-share-button-for-blogger-2

Code for Facebook Share Button Style 2

<div style="float:left;padding:4px;">
<b:if cond='data:post.isFirstPost'>
<script>(function(d){
var js, id = 'facebook-jssdk'; if (d.getElementById(id)) {return;}
js = d.createElement('script'); js.id = id; js.async = true;
js.src = "//connect.facebook.net/en_US/all.js#xfbml=1";
d.getElementsByTagName('head')[0].appendChild(js);
}(document));</script>
</b:if>
<fb:share-button expr:href='data:post.url' type='box_count'/>
</div>

Facebook Share Button Compact Style 1

facebook-share-button-for-blogger-3

Code for Facebook Share Compact Button Style 1

<div style="float:right;padding:4px;">
<b:if cond='data:post.isFirstPost'>
<script>(function(d){
var js, id = 'facebook-jssdk'; if (d.getElementById(id)) {return;}
js = d.createElement('script'); js.id = id; js.async = true;
js.src = "//connect.facebook.net/en_US/all.js#xfbml=1";
d.getElementsByTagName('head')[0].appendChild(js);
}(document));</script>
</b:if>
<fb:share-button expr:href='data:post.url' type='button_count'/>
</div>

Facebook Share Button Compact Style 2

facebook-share-button-for-blogger-4

Code for Facebook Share Compact Button Style 2

<div style="float:left;padding:4px;">
<b:if cond='data:post.isFirstPost'>
<script>(function(d){
var js, id = 'facebook-jssdk'; if (d.getElementById(id)) {return;}
js = d.createElement('script'); js.id = id; js.async = true;
js.src = "//connect.facebook.net/en_US/all.js#xfbml=1";
d.getElementsByTagName('head')[0].appendChild(js);
}(document));</script>
</b:if>
<fb:share expr:href='data:post.url' type='button_count'/>
</div>

How to install Facebook Share Count Button on your Blogger Blog?

1.Select one of the Share Button Styles and copy the Corresponding Code.
2.Now login to your Blogger Dashboard and navigate to Layout Edit Html and check the check box which says “Expand  widget templates”
3.Find this piece of code
<div class='post-header-line-1'/>
and immediately after that place our Facebook share button code(that you copied) If you were unable to find this code in your template,then look for the first occurrence of
<data:post.body/>
and immediately before that paste our Facebook Share button code(that you copied).
4.Next you have to add the fb namespace to your template tag.Your template should have the specification for the fb tag that you have used. The following namespace declaration will take care of that. To declare the namespace, find
<html
and change it to
<html xmlns:fb="https://www.facebook.com/2008/fbml"
The following screenshot will help you out.
imageThis is necessary for all FBML widgets using the fb tag.  So if you have already added the namespace while adding some other FB plugin, then you can skip this.
5. Save the template and you should get a Facebook share count button near each of your blog post
If you liked this post and if it helped you in implementing the Facebook buttons, then please consider sharing this post on Facebook using the button on the top-right of the post :)

Facebook Share Count Buttons For Blogger

0
[postlink]https://iamdaowner.blogspot.com/2012/06/facebook-like-button-for-blogger.html[/postlink]
This Tutorial will help you in adding a Facebook Like Button For Blogger. Facebook has come up with a new set of Social plugins which enable you to provide engaging social experiences to your users with just a line of HTML. The Facebook Like Button is One of them. You can see a demo of the like button on this page. The Facebook like button will allow your readers to quickly share your posts with their Facebook Friends. You can also get to know how many people liked your Blog Post .This tutorial will teach you to add a Facebook Like button for Blogger

How to Add the Facebook Like Button Below every Post

1. First Generate the Facebook code using the options below. (Code will be updated with these details)
Button Type
Text on Button
Show Send Button
Color Scheme
Font
Float
Location of the Button
Display
<div>
<b:if cond='data:post.isFirstPost'>
<script>(function(d){
var js, id = 'facebook-jssdk'; if (d.getElementById(id)) {return;}
js = d.createElement('script'); js.id = id; js.async = true;
js.src = "//connect.facebook.net/en_US/all.js#xfbml=1";
d.getElementsByTagName('head')[0].appendChild(js);
}(document));</script>
</b:if>
<fb:like expr:href="data:post.canonicalUrl" layout='standard' send='true' show_faces='false' font="arial" action="like" colorscheme="light"></fb:like>
</div>
2. Copy the Above code. Login to your Blogger Account and go to Design > Edit HTMLand click on the check box which says “Expand Widget Templates
3. Look for <data:post.body/> and immediately below that place the copied code.
4.Next you have to add the fb namespace to your template tag.Your template should have the specification for the fb tag that you have used. The following namespace declaration will take care of that. To declare the namespace, find
<html
and change it to
<html xmlns:fb="https://www.facebook.com/2008/fbml"
The following screenshot will help you out.
imageThis is necessary for all FBML widgets using the fb tag.  So if you have already added the namespace while adding some other FB plugin, then you can skip this.
4. Now Save the template and you should see the Like Button near each of your posts. You are done :)

Facebook Like Button For Blogger

Grab the widget  IWeb Gator
Powered by Blogger.

Click the Like Button Below To Receive all updates via Facebook

Powered By Blogger Tricks |

Popular Posts